DIY Fixes for Your Apartment: How to Stop Your Running Toilet
Do you often hear noises coming from your toilet? Do you see water rippling through the bowl long after you've flushed? That’s called a running toilet, and it’s a huge suck on your water bill.
But don't panic — fixing a running toilet is one of the simplest DIY home repairs. We scoured the Internet and talked to hardware expert Nathaniel Garber, owner of Garber Hardware, a family-run, West Village hardware store running since 1884, to give you the low-down on how to fix your running toilet.
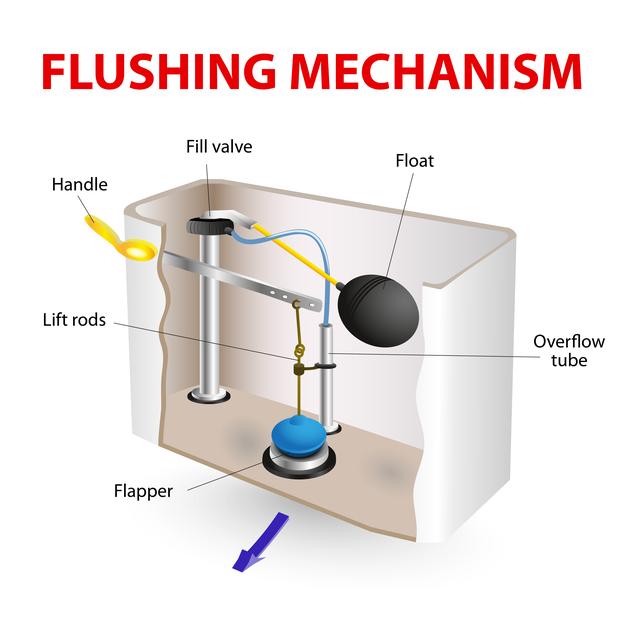
Credit: Shutterstock
First, lift the tank cover and peer inside. If the water level is unusually low and leaking through the rubber flapper in the bottom, you need to replace the flapper, which you can buy in any hardware store for $5 to $15. The constant flow of hard water and growth of bacteria in the toilet tank can wear down a flapper so that it hardens and no longer precisely fits its valve seat.
A malfunctioning flapper causes the vast majority of running toilet cases. However, if you see that the tank's water level is high, and it’s leaking instead into the overflow tube at the top, you actually need to replace the fill valve. This happens rarely but can also cause a running toilet — to learn how to replace the fill valve, check these video tutorials here and here.
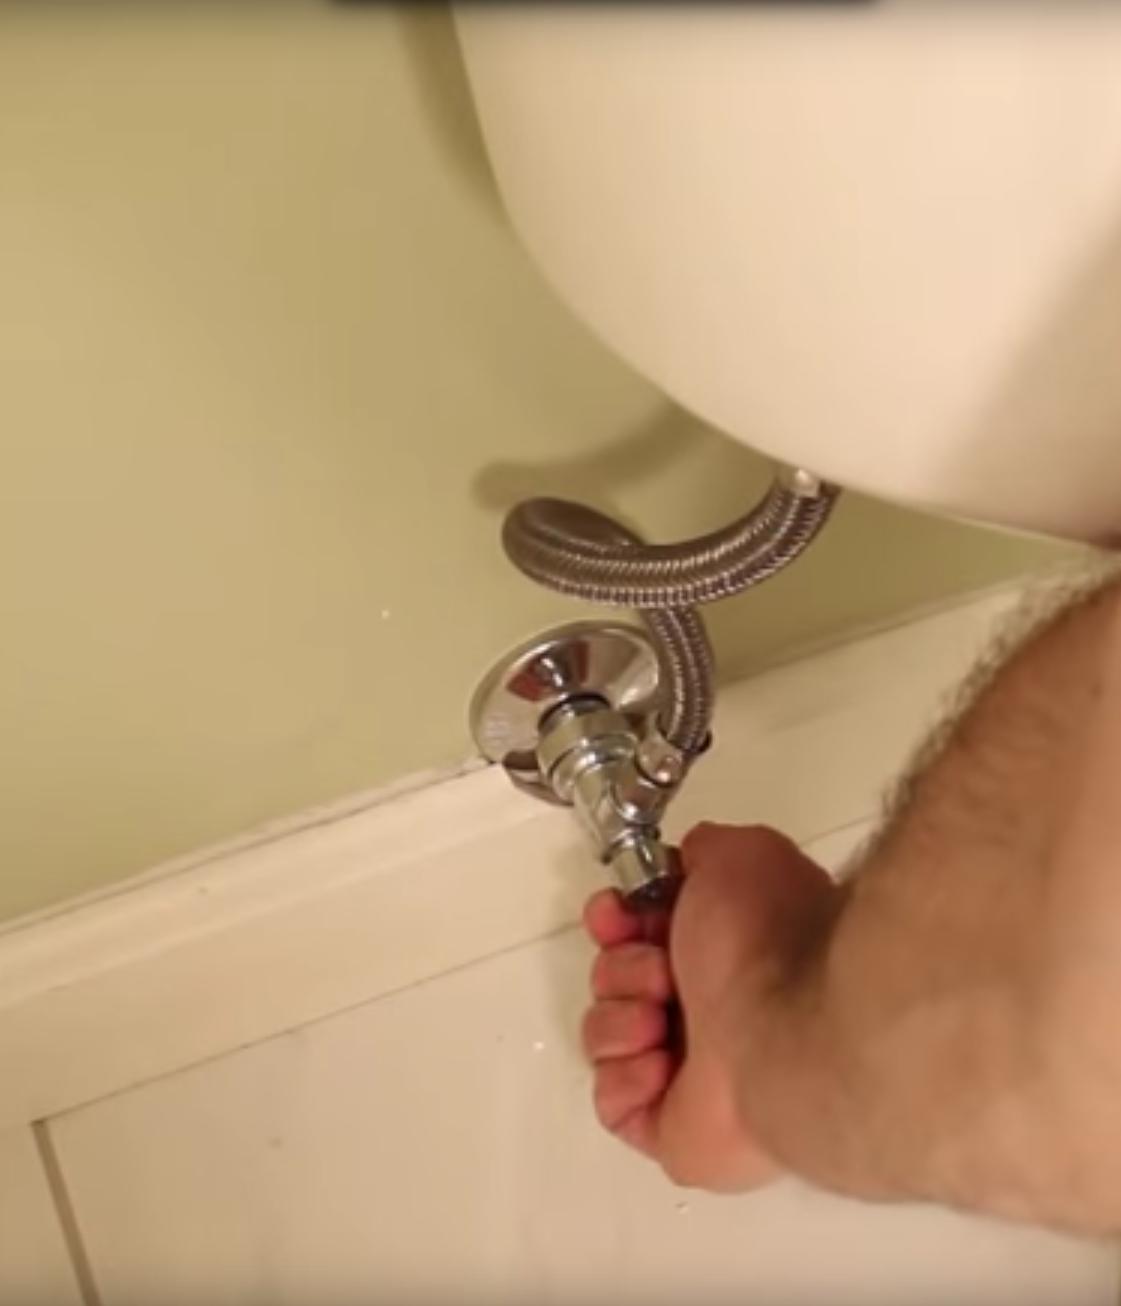
Most of the time, however, it's that flapper issue. The first thing to do is locate the water valve behind the toilet and turn it clockwise, shutting off the water supply.
Credit: Youtube/ Jeff Patterson

Then, open the tank lid and flush the toilet so that the water eventually drains out of the tank. Once the tank is empty, or as empty as it can be, reach down to the flapper and disconnect its rubber handles from the pegs of the overflow tube.
Then unhook its chain from the flush lever.
Bring your old flapper to a nearby hardware store and ask a knowledgeable employee to find a new flapper that matches your toilet's model. Most flappers come in a universal and adjustable size, but different brands sometimes have specific requirements.
Once you have a new flapper, wipe off any gunk or bacteria from the valve seat with a cloth to ensure a clean fit. Push the flapper’s rubber handles onto the plastic pegs, lining it up with the valve seat, and place the lift chain back onto flush lever, leaving about a half inch of slack on the line. Adjust the chain if necessary.
Turn the water valve located behind the toilet on again and allow the tank to refill with water. Let the water fill to about one inch below the top of the overflow tube.
Credit: Youtube/Jeff Patterson
Now test your arrangement. Open the water valve again to let water flow into the tank, and flush a few times. Watch whether the flapper properly moves up and down, especially whether it closes completely after flushing, blocking all water from escaping. If it works — congrats! You've just fixed your running toilet, saving money and water along the way.
If you want to watch the whole process in motion, watch this tutorial video from Jeff Patterson's Home Repair Tutor channel:
MORE DIY GUIDES:
► Fixing Low Water Pressure in Your Faucet► Hanging Heavy Objects on Walls► Changing a Light Switch to Light Dimmer► How to Unclog All Sorts of Drains


